Ray diagrams
Variant i Dynamics first
In this, fourth tutorial on geometrical optics, students use ray tracing in contexts for which formulas and principal rays cannot be used. Real and virtual images are introduced.
Topics Waves and optics / Geometrical optics: models, light (or shadow), ray tracing, and geometrical optics
Materials
Materials by the UW team
- Group Handout


- Instructor Guide
- Pretest
- Exam Questions

- Equipment List
Tutorial details
In the first part of the tutorial, students are led to generalize the technique of ray tracing for determining image location. They are also guided to develop a functional understanding of what is meant by image location.
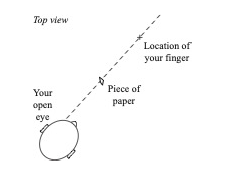
Students begin by considering an observer looking at a pin held vertically at the back of a square container of water, as shown. The pin extends above the top of the water. They are asked to sketch a ray diagram to determine the location of the image of the pin. Some students draw only one ray directly from the bottom of the pin to the observer and incorrectly predict that the image of the bottom of the pin is at the same location as the pin itself. Students are led to confront their incorrect prediction when they use the method of parallax to compare the apparent location of the bottom of the pin and the actual location of the top of the pin.
Students next consider the location of the image of a pencil held at the back of a cylindrical beaker of water. Some students are surprised to find that in this case the image is behind the object since in the previous case with a square beaker the image was in front of the object. The fact that the image appears larger than the object also incorrectly leads some students to conclude that the image is closer than the object. A student dialogue helps students confront this issue.
In the second section of the tutorial, students examine both real and virtual images and develop rules they can use to distinguish between them. Students are given two ray diagrams for an observer looking at a pin that is placed behind a beaker of water. In one case the image is real; in the other, virtual. Students use the ray diagrams to determine the location of the image in both cases and decide whether the image is real or virtual. They are led to recognize that a real image can be projected on a screen, whereas a virtual image cannot.
For instruction tips, login or register as a verified educator to see the Instructor Guide.
Prerequisites
Prerequisite tutorials
The Curved mirrors and multiple reflections tutorial is a prerequisite to Ray diagrams.
Other prerequisites
Students should have worked through the tutorial Plane mirrors. The third homework problem may be difficult for students who have not worked through the tutorial Curved mirrors and multiple reflections.
Equipment
Special Instructions
- 6 square transparent plastic containers
- 6 600-ml beakers
- 1 bucket of water
- 12 stick pins
- 12 nails, ~10 cm in length
- 6 small balls of modeling clay, to stand the nails upright
- 6 long-filament bulbs & sockets
Handouts (See Handouts):
- 12 enlargements of top-view diagram of pin in square container of water
- 12 enlargements of top-view diagram of pencil in circular beaker of water
paper towels (for clean-up)
List
- handouts
- paper towels
- white board or large sheet of paper with markers
Coming Soon! We hope to release the discussion section on each tutorial soon.
