Magnets and magnetic fields
Variant i Dynamics first
Helps students confront and resolve common incorrect ideas about magnetism by distinguishing between electrostatic and magnetic interactions.
Topics Electricity and magnetism / Magnetism: models, operational definitions, bar magnet, electric fields, magnetic fields, and point charges
Materials
Materials by the UW team
- Group Handout


- Instructor Guide
- Pretest
- Exam Questions

- Equipment List
Tutorial details
In the first section of the tutorial, students explore interactions among various common objects. They use their observations to separate the objects into three classes and create a table of interactions between the classes. We have found it useful to check to make sure each group crates consistent classes (i.e., magnets, non-magnets that interact with magnets, and non- interacting objects). Some students begin by grouping objects based on appearance rather than interactions (e.g., “reactive metals,” “non-reactive metals,” and “non-metals.”) This error can affect student ability to complete the tutorial homework.
Students use their observations to identify properties of a permanent magnet, including the number and type of poles. Many will struggle in articulating the reasoning that leads to the conclusion that like poles repel and unlike poles attract. Refer students to the tutorial Charge in which similar reasoning was used to infer the behavior of like and unlike charges.
Students then predict the interactions between (1) a magnet and an uncharged pith ball, (2) a paper clip suspended inside an aluminum-lined cup and a magnet, and (3) the paper clip (still inside the cup) and a charged rod. On the basis of their observations, students are led through the reasoning necessary to recognize that magnetic interactions are different from electrostatic interactions and to overcome the incorrect idea that the poles of a magnet have (electrostatic) charge.
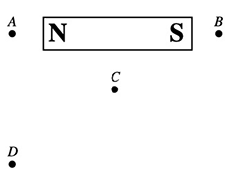
In section II of the tutorial, students learn how to use a magnetic compass to measure the magnetic field at various locations outside a magnet and to locate the poles of an unmarked magnet. They are guided to recognize that a bar magnet can be modeled as a stack of smaller magnets. Students apply the principle of superposition and make inferences from their observations using stacks of smaller magnets to determine the direction and strength of the magnetic field inside a bar magnet. Many students are surprised to find that the field does not point away from the north pole and toward the south pole inside the magnet.
For instruction tips, login or register as a verified educator to see the Instructor Guide.
Prerequisites
Prerequisite tutorials
The Charge tutorial is a prerequisite to Magnets and magnetic fields.
Other prerequisites
An understanding of charge and electrical interactions is assumed. Topics covered in the tutorial Charge are of particular importance.
Equipment
Special Instructions
In addition to the equipment listed, one will need
- 6 ferromagnetic metal bars similar in size and shape to bar magnets
- pieces of cork and other assorted ferromagnetic and nonferromagnetic objects(Include a penny or other metal that will not interact noticeably with magnets.)
- 6 “pith balls” [i.e., Styrofoam balls (about 1 cm diameter) covered with aluminum foil and hung from fine insulating thread (e.g., polyester).]
- 6 foil-lined cups
- 6 small metal paper clips suspended from short sticks by a thread
- 6 magnetic compasses
- small ceramic magnets (~48) that can be stacked to form a large bar magnet
- 6 enlargements of each of 3 diagrams in tutorial (See the Handouts section in this guide.)
Notes:
Cow magnets may be substituted for bar magnets.
Students enjoy playing with magnets. They may need to be encouraged not to spend too long on the first page of the tutorial. If the bar magnets are sufficiently strong, students might inadvertently change the magnetization of the compass needles; compass direction should be checked regularly.
Magnetic tape (cassette tape) and nonmagnetic metals are interesting objects for students to investigate.
Have extra pith balls available.
List
- fur or cloth (for charging rods)
- white board or large sheet of paper with markers
- plastic rods (~ 0.5" diameter by 10" long)
- magnets (bar)
Coming Soon! We hope to release the discussion section on each tutorial soon.
